If you have a new website in the works or just want to track the traffic across your current website, Google Analytics is a must-have tool. It provides detailed website tracking and reporting, plus it’s free, and easy to set up.
So while it’s not hard to learn how to set up Google Analytics, it is easy to get lost down the rabbit hole of tutorials, guides, and best practices that pop up in the search results. We wanted to write a simple, straightforward guide that took care of all the basics.
Here’s our guide to set up Google Analytics–it’s everything you need, nothing you don’t.
Adding Google Analytics to your site:
-
Create a Google Analytics account.
Go to google.com/analytics, click Sign In>Analytics, and then Sign Up. If you already have a Google account (for example, you have a Gmail or YouTube account) you can use that account to set up Google Analytics.
Tip: Don’t let someone else set this up using their account—if you part ways, they take their account login, and your stats, with them. Use your own account or create a new Google account specifically for this purpose. You’ll be able to grant others access to the account via the Admin panel in Analytics.
-
Add your website or mobile app.
Follow the sign-up steps to create an Account and add a Property (your website or app).
Tip: When you add your website URL, be sure to select the correct protocol (http:// or https://). You can check this by visiting your website and seeing which version is displayed in the browser. Also, be sure to enter the URL using this format: example.com (do not include any slashes or characters after the .com)
-
Install the tracking ID.
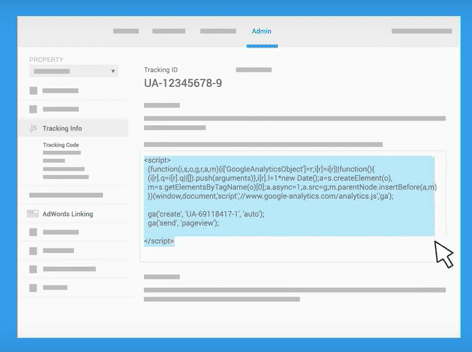
Once you’ve filled out all the required fields, click “Get Tracking ID”. This will provide you with a snippet of code that must be added to your site.
Tip: This code must be added to every page of your site to ensure complete and accurate reporting. Most website platforms, like WordPress or Shopify, have Google Analytics integrations that make this very easy. WordPress has a Google Analytics plugin, and Shopify has a Google Analytics field within their Online Store>Preferences menu where you can add the code.
That’s it! Once you’ve completed these three steps, you’ve got basic website tracking in place. Note that it takes 24 hours for Google Analytics to start populating data.
How to Set Up Google Analytics for eCommerce
If you have an ecommerce site, there are two more steps you should take to get extra value from your Google Analytics reports.
-
Turn on website search tracking.
If your website has a search box that allows visitors to search for items, you can use Google Analytics to keep track of those queries. This is a great way to see what’s popular, or perhaps, what’s not converting well and needs some attention.
-
-
- Go to Admin and click on “View Settings” from the View column
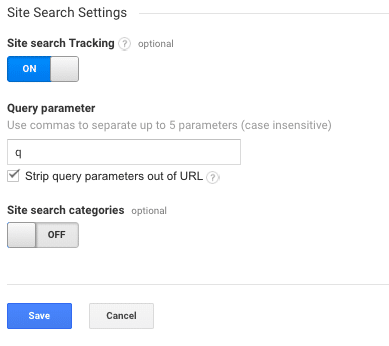
- Go to Site Search Settings (at the bottom) and turn it On
- Fill in the Query Parameter. To get this, perform a search on your site and look at the URL that is returned. The letter after the ? is the parameter you need to enter – usually it’s “s” or “q”.
-
-
Turn on eCommerce tracking.
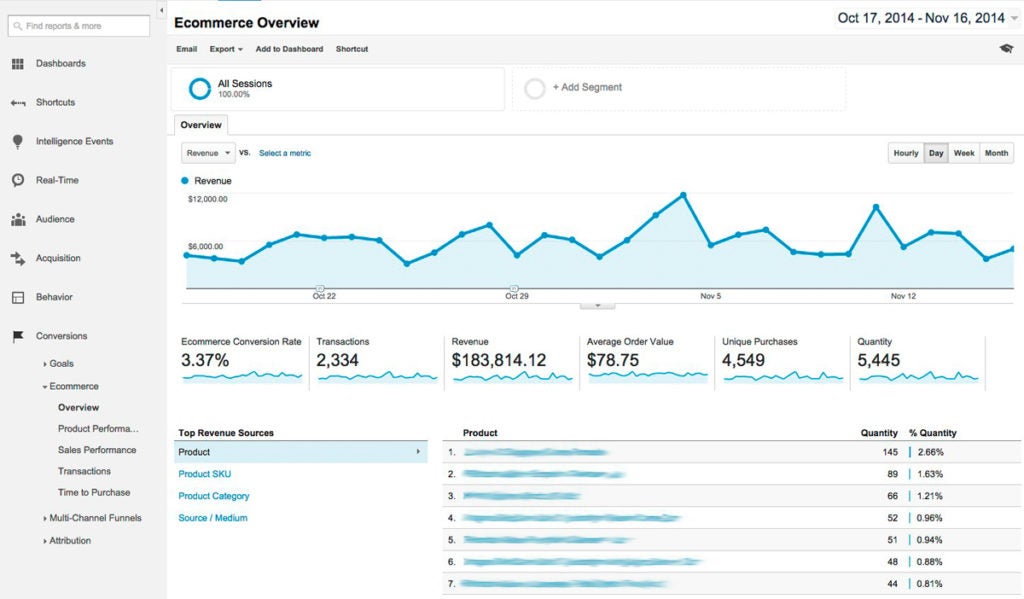
Google Analytics offers a robust set of tracking tools for ecommerce specifically. These tools allow you to connect sales data with your website data and shows things like product and transaction information, average order value, ecommerce conversion rate, time to purchase, and other data. It will help you understand where your online sales are coming from (for example, organic search, paid search, social media, or referrals), as well as what is and isn’t working on your site so that you can improve conversions. It’s vital for helping you assess which marketing campaigns are working and where your budget should be allocated for maximum ROI.
-
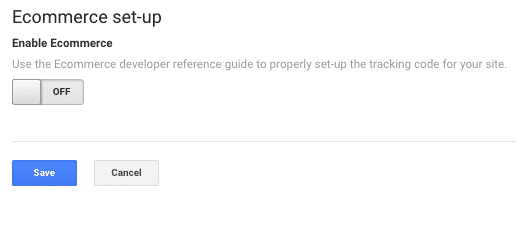
- Go to Admin and click on “Ecommerce Settings” from the View column
- Slide the Enable Ecommerce button to On
- Tip: There is also an Enhanced Ecommerce option that provides more in-depth reporting about shopper behavior but check your website platform first before turning this on. Many have a plugin that makes it easy to enable, but if they don’t, you need someone with coding skills to help you set it up correctly.
Google Analytics Goals
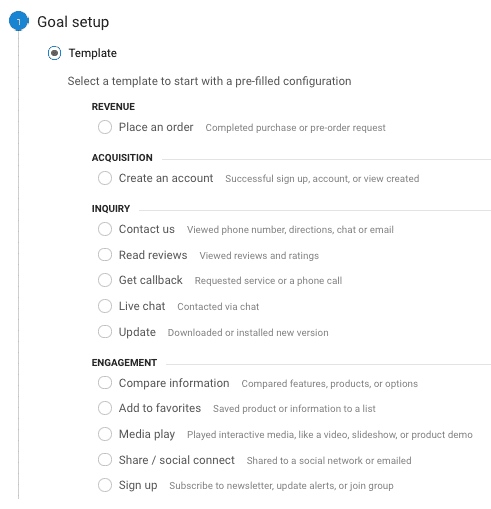
You’ll get a lot of your transactional data from the eCommerce reports, but it’s a good idea to set up Goals in Google Analytics as well. One reason is that the way eCommerce transactions and Goals are tracked is slightly different, with Goals combining all transactions that occur within a visit into one goal. You can also use Goals to track non-purchase-related events, such as a newsletter subscriptions or “contact us” form fills.
To create a Goal, click on the Admin button, then Goals under the View column. There are templates for commonly tracked goals that you can choose from, or you can click Custom to create your own. For step by step instructions on how to create four essential ecommerce goals, click here.
Tracking Campaigns in Google Analytics
If you’re running several different marketing campaigns (like paid search, display ads, and email), you want to be able to clearly see how each are performing for you in Google Analytics. The best way to do this is to use unique tracking URLs for each campaign. A tracking URL allows you to specify the source, medium, and campaign so that it is clearly displayed in Google Analytics.
You can use Google’s campaign URL builder to generate these quickly and easily.
Once the tracking URLs are in place in your campaigns, you can see the data in Acquisition>All Traffic>Source/Medium, and also in Acquisition>Campaigns.
Viewing Google Analytics Reports
Ready to check your stats? Here’s a quick rundown of the what you’ll find in each menu to help you navigate your dashboard:
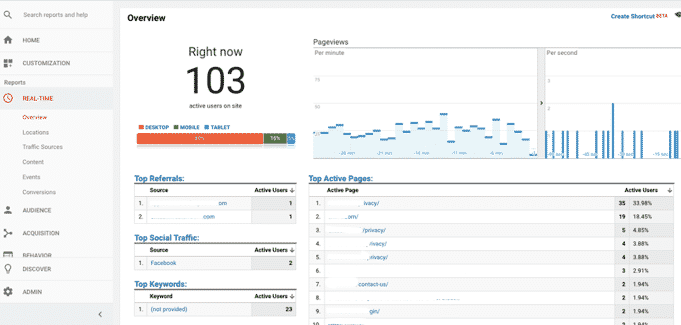
Real-time: This gives you data about what’s happening on your site at that very moment. You can see how many people are on the site, what pages they’re interacting with, and any goal conversions that are occurring.
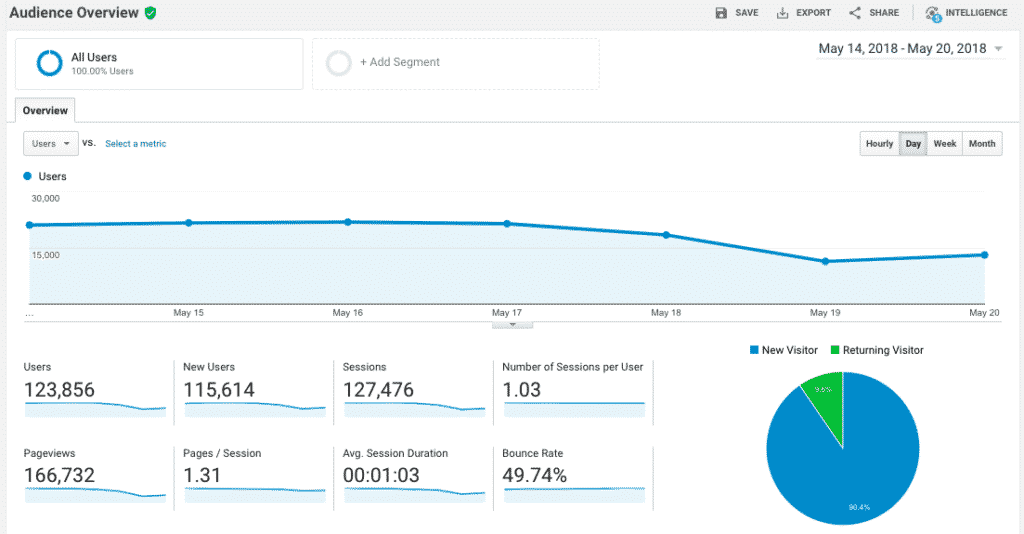
Audience: This is where you go to see the number of users, sessions, pages/session, bounce rate, average session duration, and new vs. returning users. You can also access other interesting stats, such as demographics, geography, and mobile usage, among others.
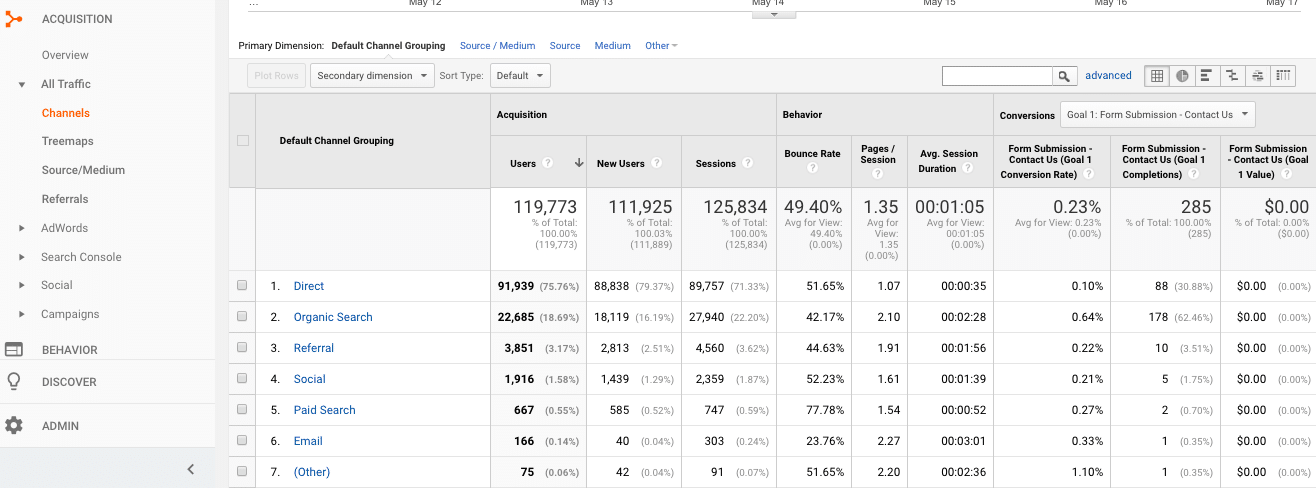
Acquisition: The Acquisition menu will tell you where your traffic is coming from. The Channels report breaks down your traffic from Direct (those who typed your URL directly into the browser), Organic Search (those who found you by searching on Google or another search engine), Referral (those who found you from a link on another site), Social (traffic from social media), Paid Search (traffic from paid search campaigns – if you’re running any), and Email (traffic from links in email campaigns you’ve sent). Any other campaigns you’re running (such as Display) will also show here.
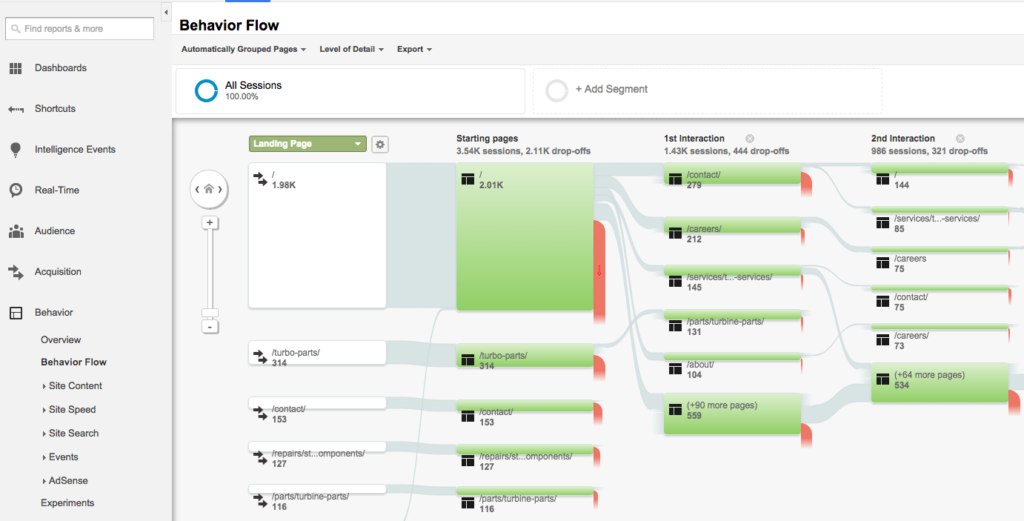
Behavior: This is where you can get insights about how visitors are moving through your site (the Behavior Flow report), the performance of specific pages, and details about site search.
Conversions: This is your go-to menu for everything related to actions that occurred on your site. If you created Goals and/or enabled eCommerce tracking, this is where your data will be.
Analyze, Learn, and Adjust
Once you’ve set up Google Analytics and collected enough data, the fun part begins. You’ll be able to learn about your visitors, have a clearer picture of what products are popular, what marketing is working, and tie revenue back to your site. You’ll have the insights you need to identify areas of your site that require adjustments, and the reports to show the impact of your improvements.
Ready for more? Check out Google Analytics for Beginners from Google Analytics Academy. Have a WordPress site? Read this. Using Shopify? Check this out. And want to learn more about retargeting for in-app, social, and video? Download our eBook below!


